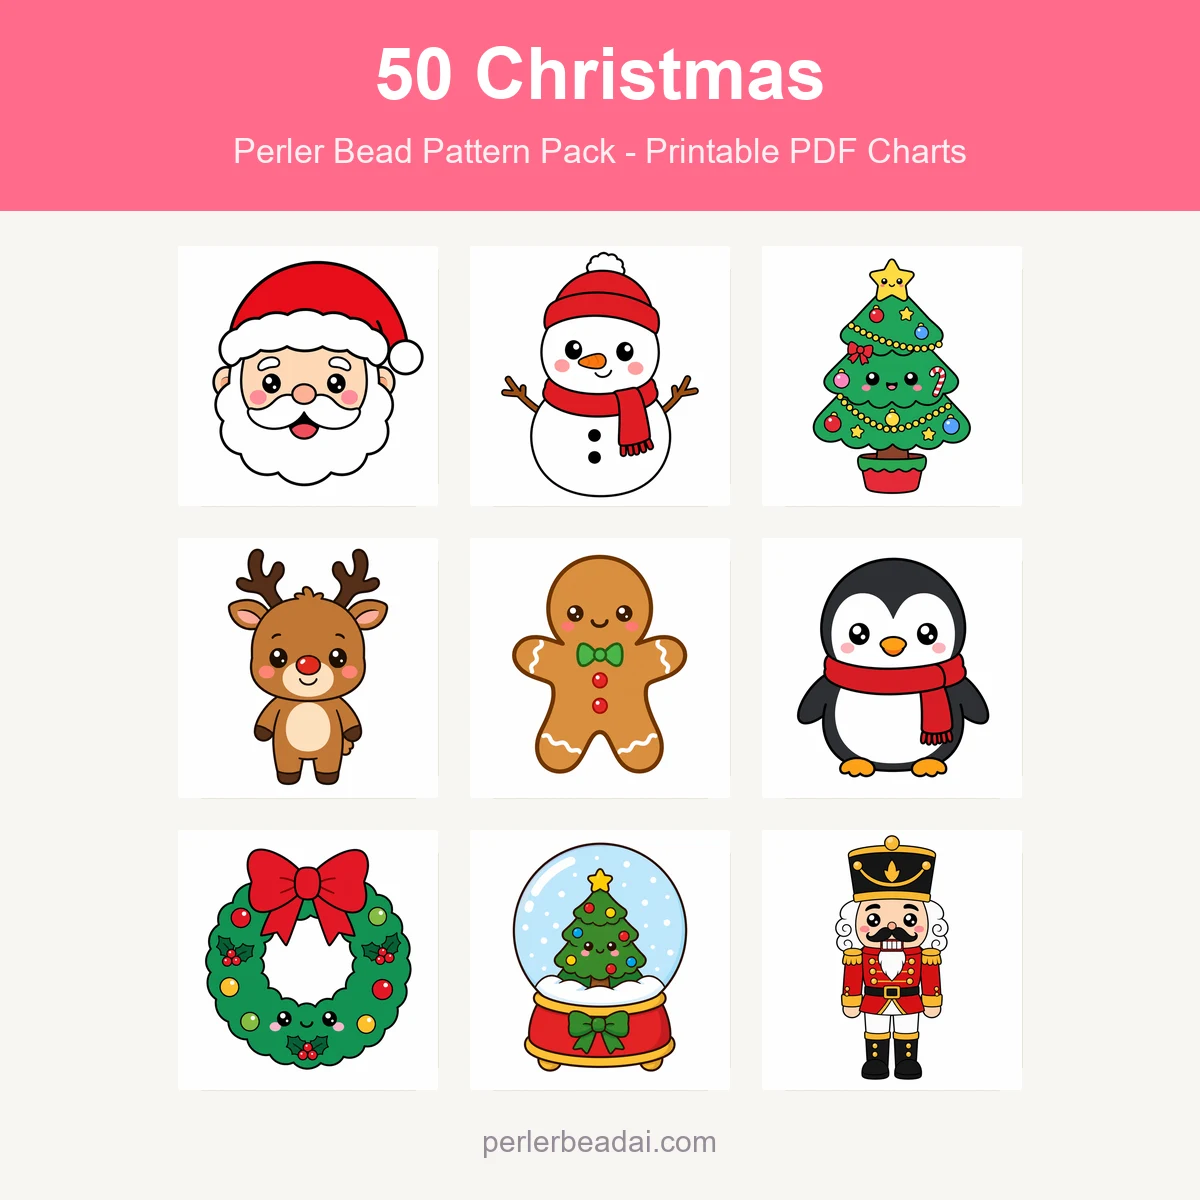
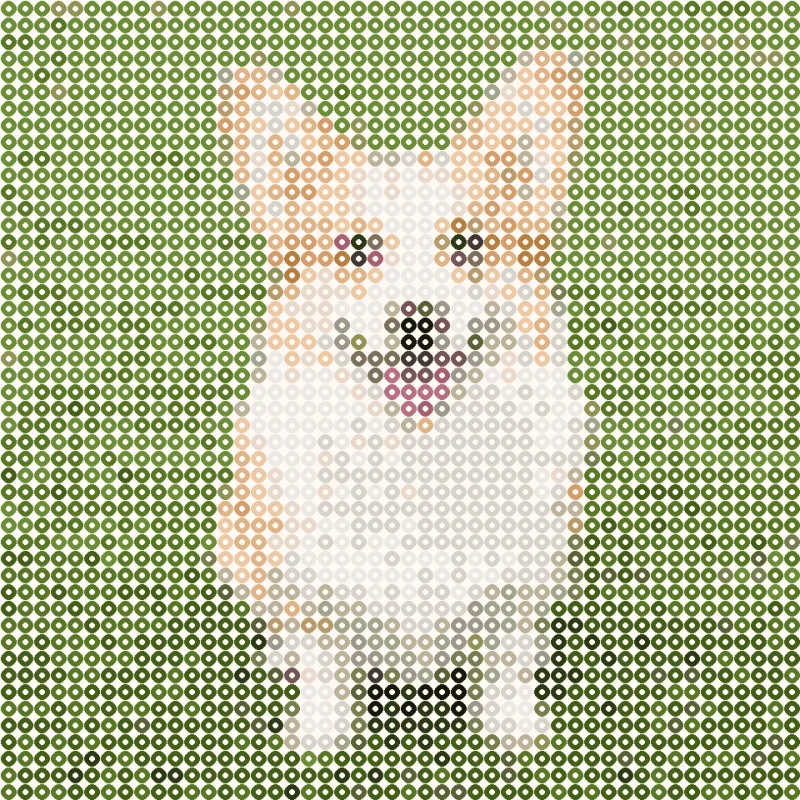
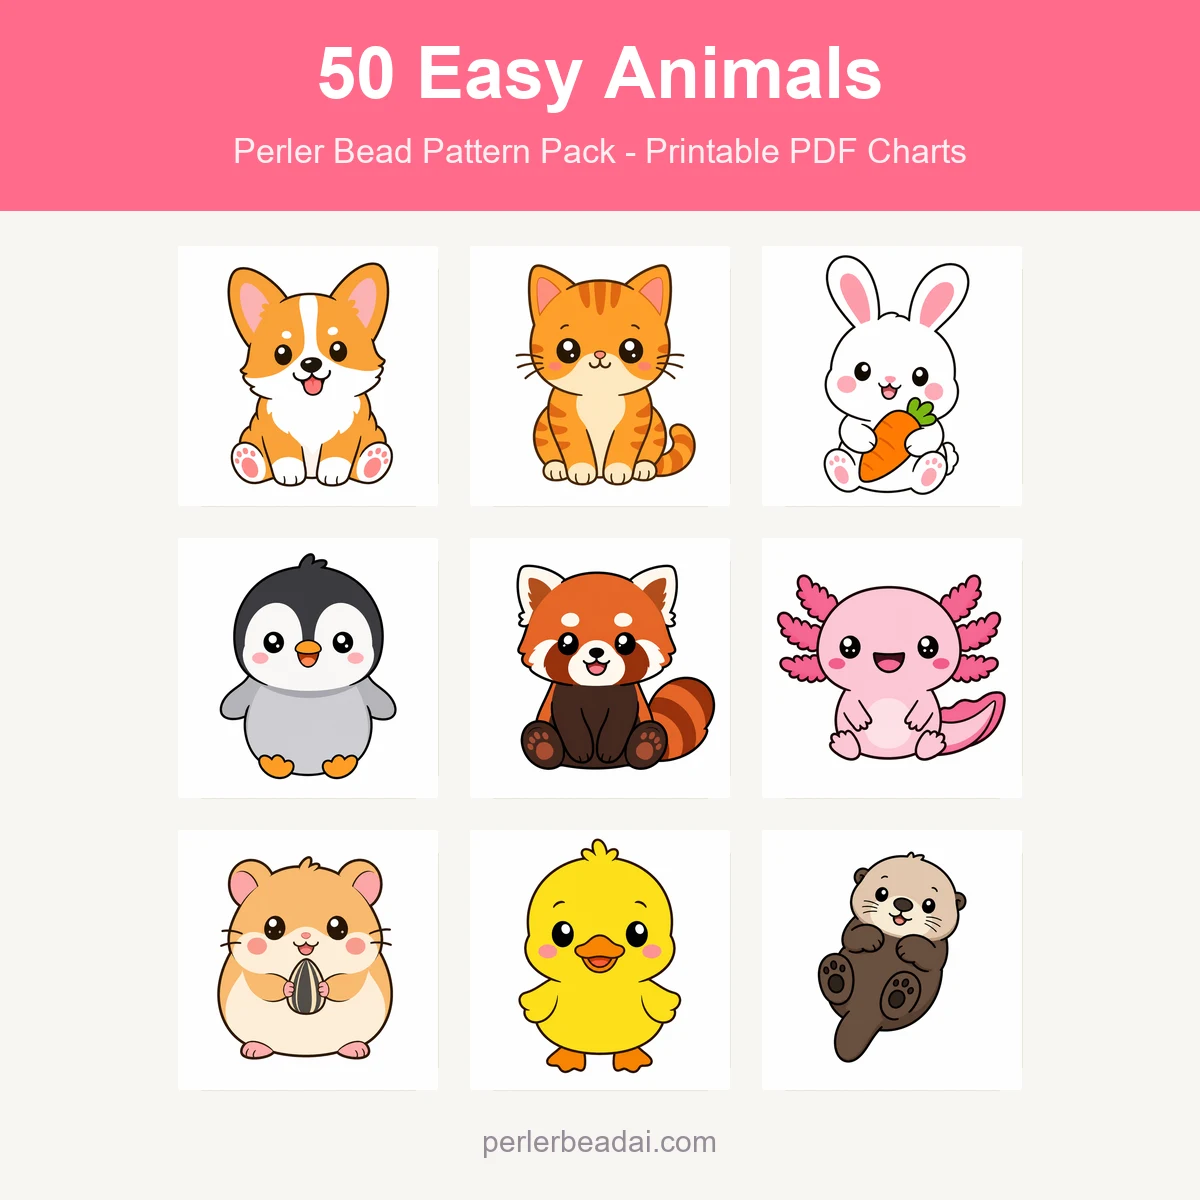
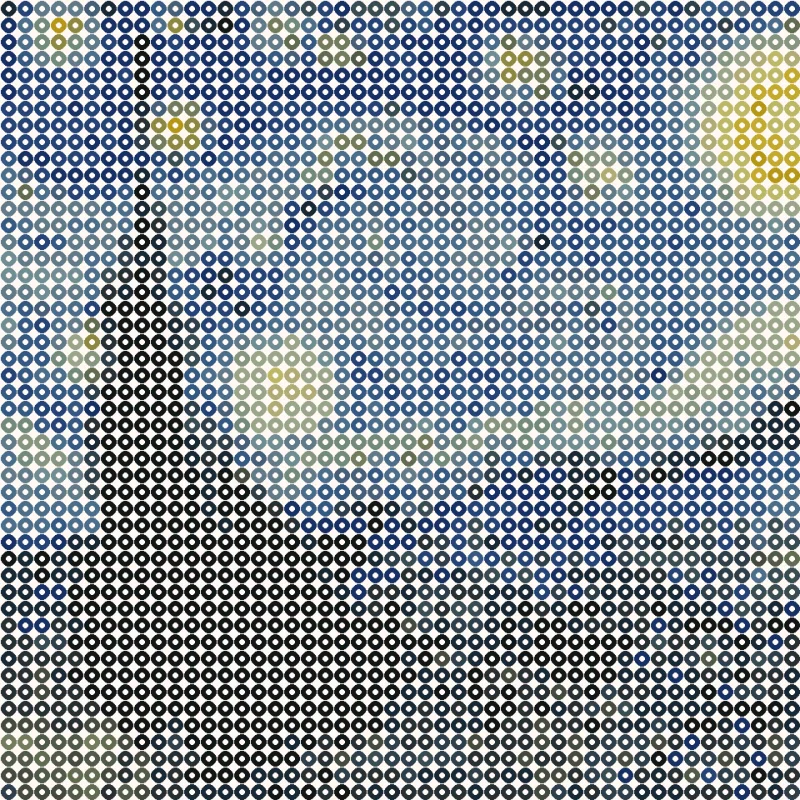
TL;DR: Christmas bead patterns that actually work: snowflakes (2 colors, mistake-proof), trees, ornaments, candy canes, and a 29×29 wreath for the ambitious. All free and printable from the free editor — most gift-size pieces finish in under two hours.
Handmade Christmas decorations hit different, and fuse beads are the cheapest way to make a tree full of them. The trick is picking patterns that survive bead scale: bold shapes, few colors, and symmetry that hides small mistakes. Here are 20 we’ve built ourselves — every one gift-ready with a ribbon loop.
Nutcracker — 25×40, 7 colors. The medium-difficulty showpiece.
Big builds (5 patterns)
Wreath — 29×29, 5 colors. Green ring, red bow, berry dots. A full evening.
Stocking — 29×35, 5 colors. Red with white cuff; add a name in bead letters.
Christmas village house — 40×40, 7 colors. Snowy roof, glowing windows.
Sleigh — 40×25, 4 colors. Red body, gold runners.
Nativity star scene — 40×40, 6 colors. The weekend centerpiece.
Turning bead pieces into gifts
The gift trick is the finish, not the pattern. Thread a ribbon loop through a top bead gap before ironing and any piece becomes a tree ornament. Glue a magnet dot on the back and it’s a fridge gift for grandparents. Iron a set of small snowflakes, string them on baker’s twine, and you have a garland that ships flat in an envelope — our tested “mail to family” gift. For teachers, a single round ornament in school colors with the year in bead letters takes 40 minutes and gets kept for decades.
Candy cane, snowflake, and round ornament — all 2–3 colors, all under 30 minutes. Snowflakes especially: the symmetry means any small error appears on all six arms and looks intentional.
How early should I start Christmas beading?
For ornaments and garlands, two weekends is comfortable: one to bead, one to iron and finish. Big pieces like the wreath or village house deserve a weekend each. Bead counts on every pattern tell you exactly how long to budget.
Can bead ornaments go on a real tree with lights?
Yes — fused beads are stable plastic. Keep them off the bulbs themselves (LED lights run cool and are ideal), hang by ribbon, and they’ll outlast the tree.
Can I make a pattern from our family Christmas photo?
Absolutely — that’s the family pattern guide‘s whole job. Crop tight on the faces, give it the widest grid you can, and it makes an extraordinary gift.
Written by the PerlerBeadAI craft team. Every pattern here was designed, beaded, and ironed by us. Last updated: July 2026
Try one of our free printable charts — the Snowflake Heart, the Donut and the Donut — each with exact bead counts and Perler, Hama and Artkal color codes.
TL;DR: Perler and Hama beads are both 5 mm fuse beads that work identically on the same pegboards and fuse at the same temperature — you can mix them in one project. The real differences: Perler has 103 colors (US/easiest to find), Hama has 92 (EU standard), and their “same-named” colors differ by up to ΔE 5+, so pick one brand per project when color accuracy matters.
New to fuse beads? Read what are Perler beads first. It.s the first question every new beader asks standing in the craft aisle: Perler or Hama? The good news is the answer barely matters for your first projects — they’re the same size, same shape, same ironing process, and they fuse together happily. The differences that do matter show up later: color ranges, regional availability, and price. Here’s the honest breakdown from a bench that uses both.
The short version
Perler
Hama
Bead size
5 mm midi
5 mm midi
Colors in standard line
103
92
Pegboard compatible
Yes, both ways
Yes, both ways
Fuse together
Yes — same 135–150 °C window
Where it’s easiest to buy
US, Canada
Europe, UK
Also offers
Mini (2.6 mm), biggie beads
Mini (2.5 mm), maxi beads
Do they actually work together?
Yes, completely. Both brands are 5 mm tall, 5 mm diameter polyethylene cylinders. They sit identically on any standard pegboard (either brand’s boards, or third-party ones), and they fuse in the same temperature window — in our ironing tests, mixed-brand pieces came out indistinguishable from single-brand ones. The only caution is color: a Perler red and a Hama red side by side in the same area can look slightly different after fusing, so mix freely for fill areas but match brands where a color needs to be uniform.
Colors: where the real difference lives
Perler’s standard line runs 103 colors; Hama’s runs 92. But the count matters less than the mapping — only about a quarter of colors have a close equivalent in the other brand. We computed this properly: using CIEDE2000 color-difference math against a 291-color reference set, only 12 colors matched Hama excellently (ΔE < 2) and just 3 matched Perler excellently. In practice: if a pattern lists Hama codes and you bead in Perler, expect roughly one color in four to come out visibly different. The full numbers are in our Color Data Report, and every color’s closest cross-brand match is searchable in the color library.
Availability: buy what’s near you
This is the most practical difference. Perler dominates US craft stores (Michaels, Joann, Amazon US); Hama dominates Europe (most toy stores, Amazon EU). Importing the other brand is always possible but rarely worth it for standard colors — shipping costs more than the beads. Artkal, the third major brand, is worth knowing if you order online anyway: its S series runs 199 colors, the largest line anywhere, and it’s the best cross-brand matcher in our data.
Quality: what we actually noticed
Honest bench notes from hundreds of fused pieces: Perler beads are marginally more uniform in height, which matters on big flat pieces where one tall bead shows. Hama colors tend to run slightly more saturated, which photographs beautifully. Both brands occasionally ship a malformed bead in a bag (a “dud” with no hole or a half-height piece) at roughly the same rate — sorting them out while placing takes seconds. Neither brand has a meaningful durability difference after fusing; pieces from both survive years of handling.
Which should a beginner buy?
Buy whichever is on the shelf near you, in a mixed-color bag of 1,000+, plus black and white separately (you always run out of those first). That’s the whole answer for months one through three. When you outgrow it, pick patterns designed for your brand — or use the free editor, which re-matches any pattern to Perler, Hama, or Artkal palettes automatically, so the bead list you print is the one you can actually buy.
Perler vs Hama FAQ
Can you mix Perler and Hama beads in one project?
Yes — same size, same fusing temperature, same pegboards. Mix freely for multicolor fills; keep one brand where a large single-color area needs to look perfectly uniform.
Do Perler and Hama pegboards work for both brands?
Yes. Both are 5 mm peg spacing; any standard midi pegboard from any brand holds either bead.
Which brand has more colors?
Perler has 103 in its standard line, Hama 92 — but Artkal S beats both at 199. More important than count is cross-brand matching: see our Color Data Report for the full ΔE data.
Is one brand better for kids?
They’re equivalent — same size, same safety profile, both for ages 6+ with adult ironing. For under-6s, both brands make larger beads (Perler Biggie, Hama Maxi) that are easier on small fingers.
Written by the PerlerBeadAI craft team. We bead with both brands weekly; the color numbers here come from our own CIEDE2000 dataset. Last updated: July 2026
Try one of our free printable charts — the Honey Bee, the Cherries and the Friendly Ghost — each with exact bead counts and Perler, Hama and Artkal color codes.
TL;DR: A full 29×29 board uses exactly 841 beads, a 52×52 uses 2,704, and a 58×58 uses 3,364 — but real patterns only fill 60–80% of the grid. Quick rule: beads needed ≈ width × height × 0.7. The charts below give exact numbers for every standard size, and the editor prints the exact per-color count for your specific pattern before you buy anything.
Nothing stalls a project faster than running out of one color with twenty beads to go. The fix is knowing the numbers before you start — and they’re simpler than most people expect. Here’s the complete reference: exact bead counts for every standard grid, the fill-rate math for real patterns, and how to never run out mid-project again.
Exact bead counts by board size
These are the maximums — what you’d use if every single peg held a bead:
Grid
Max beads (100% fill)
Typical pattern (60–80% fill)
Standard bags to buy*
15 × 15
225
135–180
1 mixed bag
20 × 20
400
240–320
1 mixed bag
29 × 29 (1 standard board)
841
500–670
1 mixed bag
40 × 40
1,600
960–1,280
1–2 bags
52 × 52
2,704
1,620–2,160
2–3 bags
58 × 58 (2×2 boards)
3,364
2,020–2,690
3 bags
78 × 78 (3×3 boards)
6,084
3,650–4,870
5+ bags
104 × 104 (4×4 boards)
10,816
6,490–8,650
7+ bags
*A standard mixed bag holds 1,000 beads across many colors. “Bags to buy” assumes a typical multi-color pattern; single-color math is below.
Why real patterns use fewer beads than the maximum
Almost no pattern fills its whole grid. A character on a 29×29 board might occupy 500–600 pegs; the rest is empty background. Across every pattern we’ve published, the fill rate lands between 60% and 80% of the grid — dense silhouettes at the top of that range, line-art and small-centered subjects at the bottom. That’s where the 0.7 multiplier comes from: it’s the number that gets your shopping right 90% of the time.
Single colors: the 80/20 problem
The tricky part isn’t total beads — it’s that one or two colors always dominate. In our pumpkin pattern (54×54, 2,704 beads), the orange alone took 977 beads and the outline black 1,367; the other four colors shared 360. That’s typical: the main color of a bold pattern is usually 30–50% of the total, and the outline color can take even more. Mixed bags rarely contain more than 100–150 beads of any one color, which is why experienced beaders buy black, white, and their project’s main color as separate single-color bags.
How to get the exact count for your pattern
Charts get you close; exact counts need your actual pattern. The free editor computes them automatically: convert or draw your design, and the bead list shows the precise count for every color — print it and take it shopping. It also re-matches the whole pattern to Perler, Hama, or Artkal palettes, so the counts come out in codes you can actually buy. If you’re converting a photo, our photo-to-pattern guide covers the grid-size choice that determines the count.
Buying rules that prevent mid-project disasters
Always buy 20% more of the dominant color than the pattern says. Dropped, lost, and malformed beads are a fact of life.
Black and white first. Outlines and highlights appear in nearly every pattern; keep a dedicated bag of each.
One mixed bag covers any single-board project. 29×29 patterns rarely need more than ~170 beads of any color.
Big pieces: count before you start. For 58×58 and up, print the bead list and physically set aside each color first — and always check our ironing guide before you start — finding out you’re 200 short at bead 3,000 is misery.
Bead count FAQ
How many beads are on one pegboard?
A standard square 29×29 pegboard holds exactly 841 beads when completely full. Typical patterns fill 500–670 of those pegs.
How many beads come in a standard bag?
Mixed bags are usually 1,000 beads across 10–20 colors (50–150 per color). Single-color bags run 1,000–6,000 depending on the brand. Perler and Hama also sell large tubs of 6,000–22,000 mixed beads for heavy users.
How do I estimate beads for a custom pattern?
Width × height × 0.7 for the total, then assume the top color is a third of that. For anything you’ll spend more than an evening on, use the editor — it prints exact per-color counts free.
Do mini beads need the same math?
The same formula applies, but mini (2.5–2.6 mm) beads come on different standard boards — a 29×29 mini piece is physically much smaller, so the same grid holds far fewer square centimeters. Check the bead list the editor prints; it works for any grid size.
Written by the PerlerBeadAI craft team. The fill-rate and dominant-color numbers here come from our own published patterns, not estimates. Last updated: July 2026
Try one of our free printable charts — the Honey Bee, the Cherries and the Friendly Ghost — each with exact bead counts and Perler, Hama and Artkal color codes.
TL;DR: Drop any photo into the free PerlerBeadAI editor, and it converts the image into a bead pattern in about a minute — grid, colors, and bead counts included. Everything runs in your browser, so the photo never leaves your device. Below: how to pick the right photo, the right grid size, and the right color count for a result that actually looks like the original.
Every bead portrait starts the same way: a photo someone loves, and the question “can this become a pattern?” The answer is almost always yes — but the difference between a muddy brown blob and a portrait people recognize comes down to three decisions: which photo, how many pegs, and how many colors. This guide walks through all three, then the full conversion process step by step.
What makes a photo convert well?
Beads are pixels — one bead, one block of color. That single fact explains every rule that follows:
Fill the frame with the subject. A face that occupies half the photo gets half the beads. Background scenery spends beads where nobody is looking.
Simple backgrounds win. A plain wall converts to a handful of beads; a busy garden converts to hundreds of confetti pixels that fight the subject.
Even, natural light. Harsh side-light becomes dramatic shadows — sometimes striking, often muddy. Window light is the sweet spot.
Sharp beats pretty. A slightly boring but crisp photo always converts better than a gorgeous blurry one.
If your favorite photo fails these tests, crop it before converting. Cutting a full-body group shot down to two faces is the single highest-impact edit you can make — our family pattern guide shows exactly why.
Choosing grid size: how many pegs do you need?
The grid is your resolution. Fewer pegs means chunkier, more cartoon-like results; more pegs means finer detail at the cost of more beads and more hours. The honest guide:
Grid
Best for
Beads
29×29
Cartoon avatars, icons, single faces
~700–900
50×50
Pet portraits, couple photos
~2,000–3,000
58×58+
Weddings, detailed portraits
~3,000+
Multi-board
Groups, wall art, gifts
5,000+
Our rule of thumb from hundreds of test conversions: one recognizable face needs at least 29 pegs across. Two faces need 50. A group of four needs the widest grid the editor offers — or a tighter crop.
Choosing colors: more is not better
It sounds wrong, but limiting colors is what makes a bead pattern readable. A photo contains thousands of shades; beads come in about 50. When the converter squeezes a photo into too many colors, you get noise — single stray beads in near-identical shades. Squeeze it into fewer colors and the image snaps into clean shapes.
8–12 colors: cartoon style, bold shapes, fastest to bead. Best for avatars and icons.
12–16 colors: the portrait sweet spot. Skin tones, hair, and background all get their own shades.
16–20 colors: fine detail territory — lace, fur, textured clothing. Only worth it at 50+ pegs.
Step by step: photo to pattern in five minutes
Step 1 — Open the editor and drop in your photo
Open the pattern generator and drag your photo onto the canvas. The conversion runs entirely in your browser — the image is processed on your own device and never uploaded anywhere. There is no account wall and no queue.
Step 2 — Pick a preset or set the grid manually
The editor ships with tuned presets for the most common subjects: pet portraits (50 pegs, 14 colors), wedding photos (58 pegs, 18 colors), and cartoon avatars (29 pegs, 10 colors). Each preset also handles background cleanup — the pet preset, for example, can drop a plain light background automatically.
Step 3 — Preview and tweak
The preview shows the exact bead result before you commit. This is the moment to experiment: drop the color count by two and watch the shapes get cleaner; widen the grid and watch eyes sharpen. Fix individual pixels by hand if one bead landed in the wrong shade — the editor is a full pixel editor, not just a converter.
Step 4 — Export the printable pattern
Export gives you a print-ready sheet: the full grid, numbered rows and columns, and a bead list with the exact count for every color. Take the list shopping before you buy a single bag — most patterns use far fewer of some colors than you’d guess, and the list tells you which.
Step 5 — Bead it, then iron it
Place beads one color at a time, working from the most numerous shade down — it’s faster and it catches mistakes early. When the last bead is placed, our complete ironing guide takes it from there: medium heat, 10–20 seconds per side, cool flat under a book.
Privacy note: your photo never leaves your device. Every pattern is generated locally in your browser — nothing to upload, nothing we could keep, nothing used for training. Bead photos of your kids with confidence.
Photo to pattern FAQ
Is the photo-to-pattern tool really free?
Yes — the editor, the conversion, and standard print export are free, with no account required. Premium adds high-resolution export for large multi-board prints and a few pro workflow features.
Will the pattern actually look like my photo?
If you give it enough pegs, yes — recognizably so. The honest expectation is “charming pixel version,” not photo copy: at 29 pegs you get a cartoon likeness; at 50–58 pegs, faces are unmistakable. Our photo-to-pattern hub shows real before-and-after examples at each size.
Which bead brands does the palette match?
Any standard 5 mm midi beads — Perler, Hama, Artkal, or MARD. The editor’s palette switcher re-matches your pattern to each brand’s color codes, so the bead list prints with the shades you can actually buy.
Can I edit the pattern after converting?
Yes — the converter is built into a full bead editor. Recolor single beads, erase background stragglers, swap entire colors, or redraw details by hand before you export.
Is my photo uploaded or used for AI training?
No. The conversion runs entirely on your own device, in your browser. We never see, store, or train on your photos — there’s nothing to delete because nothing is ever sent.
Written by the PerlerBeadAI craft team. The grid and color guidance above comes from hundreds of our own photo conversions — including the family photo that taught us to always crop to the faces first. Last updated: July 2026
Try one of our free printable charts — the Panda, the Fox and the Honey Bee — each with exact bead counts and Perler, Hama and Artkal color codes.
TL;DR: Beginners should start with patterns 20×20 to 40×40 pegs using 6 colors or fewer — big enough to look like something, small enough to finish in one sitting. Below are 25 beginner-friendly ideas in five categories, every one makeable with the free pattern editor. Print, bead, iron, done.
The hardest part of a first bead project isn’t the beading — it’s picking a pattern that won’t defeat you. Too big and it sits half-finished in a drawer. Too many colors and you spend more time sorting than placing. This list is the answer we give every beginner: 25 small, simple, genuinely good-looking patterns, grouped by theme, with the size and color count that makes each one forgiving.
Quick picks: the 5 best first patterns
If you want exactly one recommendation, start here. These five are the patterns we hand to every first-timer — small, few colors, and unmistakably cute when finished:
Simple cat face (about 20×20, 4 colors) — the classic first pattern for a reason
Star (about 20×20, 2 colors) — teaches you diagonal edges early
Small flower (about 25×25, 5 colors) — the gateway to every floral pattern
Animals (5 patterns)
Animal faces are the most forgiving beginner subjects: two eyes, a nose, and a silhouette do all the work.
Cat face — 20×20, 4 colors. Pointed ears and whisker pixels are all you need.
Dog face — 22×22, 4 colors. Floppy ears made from two-pixel steps.
Bunny — 25×30, 5 colors. Tall ears make it instantly recognizable.
Penguin — 20×28, 4 colors. A black blob, a white belly, an orange beak — done.
Fish — 25×20, 4 colors. Side profile means no symmetry stress.
Ready to go beyond faces? Our pet pattern guide shows how to turn a photo of your own animal into a bead portrait.
Food & drinks (5 patterns)
Apple — 20×22, 3 colors. A red blob with a brown stem and one green leaf.
Watermelon slice — 25×18, 4 colors. The seed pixels are the fun part.
Ice cream cone — 18×30, 5 colors. Two scoops, one cone, zero skill required.
Pizza slice — 25×25, 5 colors. Toppings are just red and green dots.
Coffee cup — 22×20, 3 colors. The steam swirl is optional and adorable.
Pixel & retro style (5 patterns)
Beads are pixels, so pixel-style designs are the most natural fit — and the most forgiving, because chunky shapes are the whole aesthetic. All of these are original generic designs, no borrowed characters:
Space invader-style alien — 22×18, 2 colors. The single most iconic bead shape there is.
Pixel heart — 15×14, 2 colors. Life-bar red, or any color you like.
Treasure chest — 25×22, 5 colors. Gold trim on brown reads instantly.
Sword — 12×35, 4 colors. Tall and thin — great for learning narrow builds.
Potion bottle — 18×25, 4 colors. One bright liquid color against dark glass.
Once two or three small pieces have gone well, these stretch you onto a full 29×29 board or a two-board layout — still simple shapes, just bigger:
Rainbow — 29×29, 6 colors. One stripe per color, perfect for using up mixed bags.
House — 29×29, 5 colors. Square walls, triangle roof, one yellow window.
Butterfly — 29×29, 5 colors. Symmetrical wings teach you to count from the center.
Cartoon avatar of yourself — 29×29, 10 colors. Use the avatar maker to convert a selfie automatically.
Two-board flower garden — 29×58, 8 colors. Your first taste of multi-board alignment.
How to print and use these patterns
Every chart in our free pattern library already downloads as a printable PDF. Making your own? Every pattern from the editor exports as a printable sheet with the grid, a per-color bead list, and exact counts. A few tips for first prints: print at 100% scale (not “fit to page”) so the grid matches your pegboard; circle each color on the list as you finish it; and when the design is placed, follow our complete ironing guide — 10–20 seconds per side on medium heat, and the piece is finished.
Beginner pattern FAQ
What size pattern should a total beginner start with?
15×15 to 25×25 pegs, using 2–5 colors. That’s roughly 150–400 beads — finishable in under an hour, with enough shape to feel like a real achievement.
How many beads do these patterns use?
The small ones use 150–500 beads; the 29×29 challenges use 600–900. A standard 1,000-bead mixed bag covers any pattern on this list several times over.
Can I make my own beginner pattern?
Absolutely — that’s what the free editor is for. Draw from scratch, or turn a photo into a pattern automatically. Set the grid to 29×29 and the palette to 6 colors, and almost any subject becomes beginner-friendly.
What’s the best age to start fuse beads?
Most kids manage bead placement from about age 6 with standard 5 mm midi beads; younger children do better with large maxi beads. An adult always handles the ironing — see our ironing guide for the safe routine.
Written by the PerlerBeadAI craft team. Every size and bead count in this list comes from patterns we’ve built and ironed ourselves. Last updated: July 2026
TL;DR: Iron fuse beads on medium heat (about 135–150 °C / 275–300 °F), no steam, for 10–20 seconds per side, with ironing paper between the iron and the beads. Press — don’t slide — then cool the design flat under a heavy book for at least 10 minutes. That is the whole recipe; everything below is the detail that keeps it from going wrong.
Ironing is the one step that turns a tray of loose plastic beads into a finished piece of art — and the one step that can ruin an hour of careful placing in fifteen seconds. Every crafter has a story about a melted pegboard, a design that fell apart in the middle, or a piece that came out half-fused. This guide is the complete answer: exact temperatures, exact times, the six mistakes that cause 90% of failures, and how to fix them.
Parameter
Setting
Iron temperature
Medium, 135–150 °C (275–300 °F), steam OFF
Time per side
10–20 seconds of gentle circular pressure
Barrier
Ironing paper or parchment paper (never wax paper)
Cooling
Flat under a heavy book, 10+ minutes
What you need (checklist)
A household iron with a temperature dial (not just “low/med/high” dots if you can avoid it)
Ironing paper — the translucent sheet that ships with most bead kits, or plain parchment paper from the kitchen
A flat, heat-safe surface: an ironing board works, a wooden cutting board works better
A heavy book or flat weight for cooling
Your finished design, still on the pegboard
Do bead brands iron differently?
Slightly, yes. Perler, Hama, and Artkal beads all fuse in the same 135–150 °C window, but they soften at different rates. In our test runs, Perler beads fused evenly at the 15-second mark on medium heat, while Artkal needed closer to 20 seconds at the same setting. The safe move is always the same: start at the low end, check through the paper, and add seconds until the bead surfaces just start to close. If you mix brands in one design — many people do — iron to the slower brand and accept a slightly fuller fuse on the faster one.
Parchment paper vs. official ironing paper
Both work. Official ironing paper is reusable for dozens of pieces and lets you see the beads fuse through it, which is why experienced crafters prefer it. Kitchen parchment paper is nearly identical and costs almost nothing. The one thing to never use is wax paper: the wax coating melts onto both the beads and your iron’s soleplate, and it smokes.
How to iron fuse beads in 5 steps
Step 1 — Check the design on the pegboard
Before the iron ever comes out, press every bead gently down onto its peg and look for gaps. One bead sitting half-off a peg will fuse tilted and leave a visible hole in the finished piece. Move the board somewhere it can sit undisturbed — bumping it now means rebuilding later.
Step 2 — Cover with ironing paper
Lay the paper flat over the whole design. It should cover every bead with margin to spare — the iron must never touch a bare bead or bare pegboard. If your design is bigger than one sheet, overlap two sheets by a few centimeters rather than leaving a seam exposed.
Step 3 — Press, don’t slide (10–20 seconds)
Set the iron down on the paper and apply gentle, even pressure in small slow circles. You are pressing the heat into the beads, not ironing a shirt. After 10 seconds, lift a corner of the paper and peek: the bead surfaces should look glossy and just begin to close over their centers. If they still look matte and separate, press for another 5–10 seconds. Keep the iron moving slowly at all times — parking it in one spot for even a few seconds creates a crater.
Step 4 — Flip and repeat
For double-sided fusing (recommended for anything that will be handled, hung, or played with): let the piece cool for one minute, then place a second flat board or stiff cardboard on top and flip the whole sandwich confidently in one motion. Lift the pegboard off — the beads stay on the paper — cover the fresh side, and iron it the same way, 10–20 seconds. Single-sided fusing is covered in its own section below.
Step 5 — Cool flat under weight
Hot fused plastic wants to curl. Slide the paper with the still-warm piece onto a flat surface, put a heavy book or a flat weight on top, and walk away for at least 10 minutes. Skipping this step is the number one cause of taco-shaped finished pieces. Larger designs need more weight and more time — a 29×29 coaster needs one book; a multi-board portrait needs a stack.
Safety note: Irons get hot enough to burn, and fused plastic stays hot for minutes. An adult handles every ironing step — kids place the beads, grown-ups do the pressing. Work in a ventilated room, and never leave a hot iron face-down on the board.
The 6 most common ironing mistakes (and how to fix them)
1. Beads melted unevenly — some flat, some untouched
Cause: the iron slid instead of pressed, or the heat was too high and melted the surface before the middle fused. Fix: drop one heat level, press in slow circles, and check every 5 seconds. Uneven spots can often be re-covered and re-pressed for a few seconds to even out.
2. The pattern falls apart when you lift it
Cause: under-ironing — the bead surfaces glossed but never actually fused. Fix: put it back on the board, re-cover, and press 5–10 more seconds. The beads should look distinctly closed, with the center holes shrinking, before you stop. A fully fused joint is stronger than the bead itself.
3. The pegboard warped or melted
Cause: the iron touched bare pegs outside the design, or the heat was far too high. Fix: always use paper with margin to spare, and iron bead-covered areas only. A warped board can sometimes be flattened under books overnight, but deep melting is permanent — boards are cheaper than ruined designs, so protect them.
4. The piece curled into a taco while cooling
Cause: no weight during cooling. Fix: if it’s still slightly warm, re-press it briefly and cool it again under a heavier book. Fully cold curls can often be rescued by re-ironing the back side for 5 seconds and re-cooling flat.
5. Colors bled or look muddy at the edges
Cause: over-ironing — beads fused so far that colors ran into each other. Fix: there’s no undo, so prevention is everything: check through the paper every 5 seconds and stop the moment the holes begin closing. Over-fused pieces also turn brittle, which matters if the piece will be bent (keychains, magnets).
6. Paper stuck to the beads
Cause: wax paper (never use it) or pressing far too long. Fix: let the piece cool completely, then peel slowly from a corner. Small paper residue usually disappears with a warm damp cloth. Real ironing paper and parchment almost never stick when used at the right temperature.
One side or both sides? The community’s oldest argument
Double-sided fusing melts the piece into one solid sheet: strongest, completely flat, with a uniform look on both faces. It’s the right call for keychains, magnets, ornaments, and anything kids will handle.
Single-sided fusing keeps the front beads round and visibly bead-like — the classic pixel-art look most people picture. It’s the right call for framed art and display pieces where only one side shows. The trade-off is strength: single-sided pieces can snap along thin sections, so frame them or mount them rather than leaving them loose.
There’s no wrong answer — but decide before you iron, because a double-sided piece can’t be un-fused back into round beads.
Ironing FAQ
How long do you iron fuse beads?
10–20 seconds per side on medium heat for standard 5 mm midi beads. Mini beads need less (5–10 seconds), and very large multi-board designs need you to work in sections, overlapping each area by a few centimeters.
What temperature should the iron be?
Medium — about 135–150 °C (275–300 °F), with steam off. On an iron without numbers, start at the second-lowest setting and work up. Every iron runs differently, so your first piece with a new iron should always be a small test.
Can you iron fuse beads without an iron?
Yes, with care: an oven at 175 °C (350 °F) for about 5 minutes on a parchment-lined tray works, as does a heat press at 150 °C for 15 seconds. A hair dryer doesn’t get hot enough, and a microwave doesn’t work at all.
Why did my beads fall apart after ironing?
Almost always under-ironing. The surface looked glossy, but the beads never fused through. Re-cover and press another 5–10 seconds per side, checking that the center holes visibly begin to close.
Do you need ironing paper?
Yes — something between iron and beads is non-negotiable. Official ironing paper or kitchen parchment both work; wax paper and bare plastic do not. Without a barrier, the iron melts the beads directly and the pegboard with them.
Can you re-iron a finished piece?
You can, and it’s the standard rescue for curled or under-fused pieces. Cover it again, press briefly, and cool under weight. Just remember every re-press fuses a little more — you can’t go back toward round beads.
Written by the PerlerBeadAI craft team. Every temperature and time in this guide comes from our own test runs with Perler, Hama, and Artkal beads — including the warped pegboard that taught us about mistake #3. Last updated: July 2026
Try one of our free printable charts — the Friendly Ghost, the Cherries and the Cherries — each with exact bead counts and Perler, Hama and Artkal color codes.
To provide the best experiences, we use technologies like cookies to store and/or access device information. Consenting to these technologies will allow us to process data such as browsing behavior or unique IDs on this site. Not consenting or withdrawing consent, may adversely affect certain features and functions.
Functional
Always active
The technical storage or access is strictly necessary for the legitimate purpose of enabling the use of a specific service explicitly requested by the subscriber or user, or for the sole purpose of carrying out the transmission of a communication over an electronic communications network.
Preferences
The technical storage or access is necessary for the legitimate purpose of storing preferences that are not requested by the subscriber or user.
Statistics
The technical storage or access that is used exclusively for statistical purposes.The technical storage or access that is used exclusively for anonymous statistical purposes. Without a subpoena, voluntary compliance on the part of your Internet Service Provider, or additional records from a third party, information stored or retrieved for this purpose alone cannot usually be used to identify you.
Marketing
The technical storage or access is required to create user profiles to send advertising, or to track the user on a website or across several websites for similar marketing purposes.